
Attach files and images to your pages (MT4)
- Applies to:
- MindTouch 4 (legacy)
- Role required:
- Author
This article describes where users can find file attachments within an Expert page.
File Attachments
File attachments are accessible at the bottom of Expert pages for Pro Members. Note that this section is hidden from Community Members and Anonymous users as they do not have the ability to add file attachments. Community Members and Anonymous users can still find file attachments by searching for them on your site.
Unsupported Attachment Types
The following file extensions are not supported as attachments because of security restrictions:
- HTML
- XHTML
- HTM
- EXE
- VBS
- SCR
- REG
- BAT
- COM
Files not included on this list can be successfully attached within Expert pages.
Attaching Files
You can attach a file to an Expert article so that it can be embedded (in the case of an image) or linked to. You can attach a file to Expert in two ways:
- Drag and Drop - This allows you to drag a file onto the Expert page and it will be attached. If you are in Edit mode and the file is an image it will be embedded and attached in one action. If the file is not an image and the editor is open, then a link will be inserted in the page. Read more about drag and drop image embedding.
- Attach a File - This allows you to click on the Attach a File button and then navigate through your local computer to find the file you want to attach. Once attached it will appear in the listing of files.
Attachments Table Navigation
You have a couple of options for sorting and searching within the attachments table. The search box at the top of the attachments table will search the attachments name and the description but will not search the contents of the files. Keep in mind that if you attached a file to your page and deleted it within the page editor it will still appear in the attachments drop-down unless you deleted it there too.
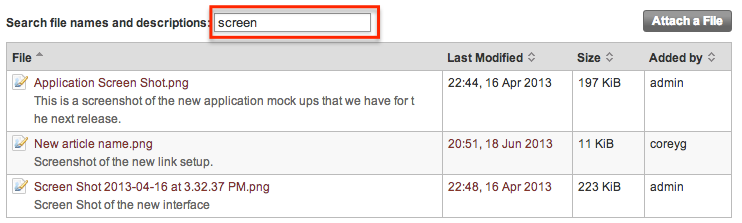
To search for a file, enter a query in the search box and the results will automatically filter:
You also have the ability to sort the File, Last Modified, Size, and Added by columns by clicking on the column name. The attachments table is also configured to allow for continuous scrolling to access more attachments that are not listed on the screen.
NOTE: You can have a max of 1,000 files attached to a single page.
Deleting a File
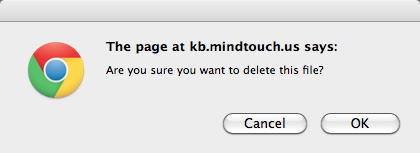
Selecting "Delete" from the attachment drop-down menu will bring up a system window asking you to confirm your decision. Click "OK" to delete or cancel to do otherwise.
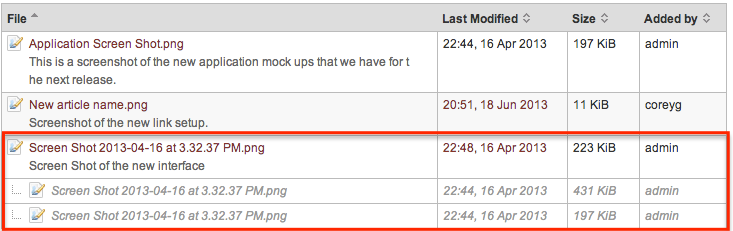
NOTE: Deleting the image in the attachments drop-down as shown above instead of deleting the image on your page will leave the below image in place of the image you deleted. To prevent this, just delete the image on your page.
Seeing Previous Versions of Files
If you see that a Last Modified date is a link, you can click on that link to see the previous versions of that file:
Move/Rename File Attachment
You can move or rename it by hovering over the file and then select the move icon:
This will then load the move/rename dialog where you can use the Back, Home, and User Icon to navigate to the page you want to move the file to and then select the page and click Move file:
If you want to rename the file, then you would edit the Title of the file in the same dialog and then click the Move file link. This will then change the name of the file in the attachments table.
Descriptions for Files
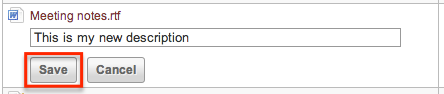
Once you've attached a file to an Expert page, you can add a description to that file which will be indexed by the Expert Search engine along with allowing you to filter at the attachments level. To add a description, hover over the (no description) text and click on the pencil icon:
This will allow you to add a description to your file. Once you have finished the description, click the Save button:
NOTE: Descriptions can only be a max of 500 characters. If you exceed that, then when you save the description will be truncated to only have 500 characters.
Indexing File Contents
Expert will index the contents of some file types allowing them to be searchable throughout the site. The following file types are supported for indexing up to 5 MB in size:
- TXT
- Word
- PPT
- XLS
- RTF
If one of the file types above is attached to a page and is greater than 5 MB, its title will be indexed but its contents will not.
Drag and Drop
The drag and drop feature is a wonderful edition that makes adding files and images to the site easy and fast. With our software you can download files up to 256 MB simply by clicking on it and letting the icon go on the page. When not in edit mode, the file is attached to the page.When the page is in editable mode, however, Mindtouch will automatically attach the file directly to the page surface and leave a copy of it in the attachment section of the page.
How to drag and drop directly to the page surface
1.) Find a file of your choice and get it ready to drag over to your Mindtouch site.
2.) After you have it names/saved on your computer open it and drag and drop it on your page.
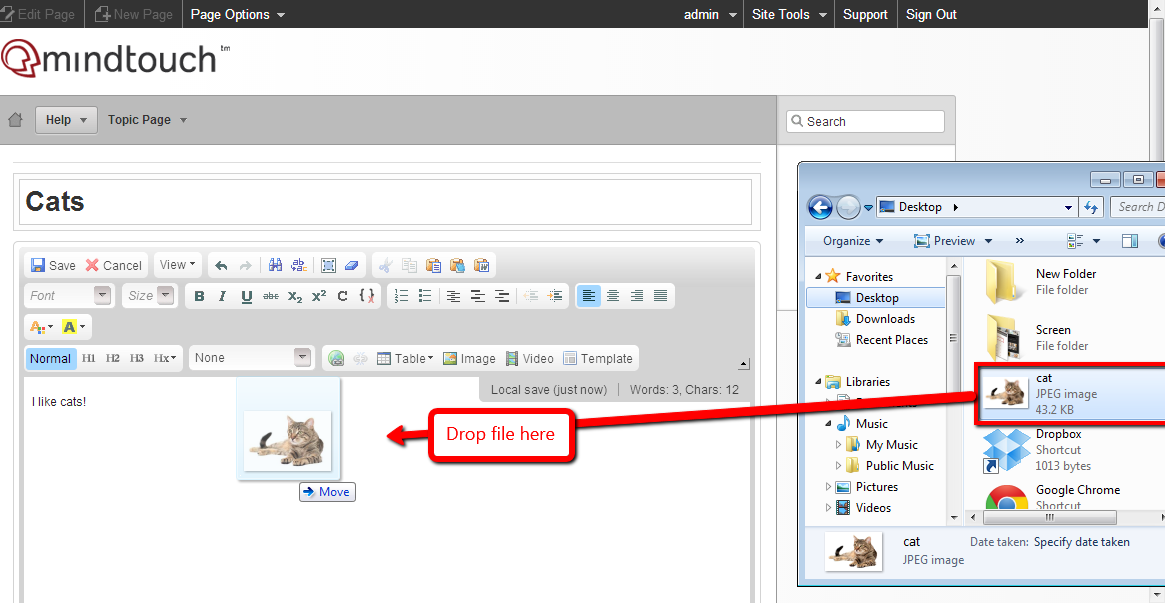
3.) After clicking Save you should have noticed the file pasted to your page and saved a copy of itself in your attachment tab.
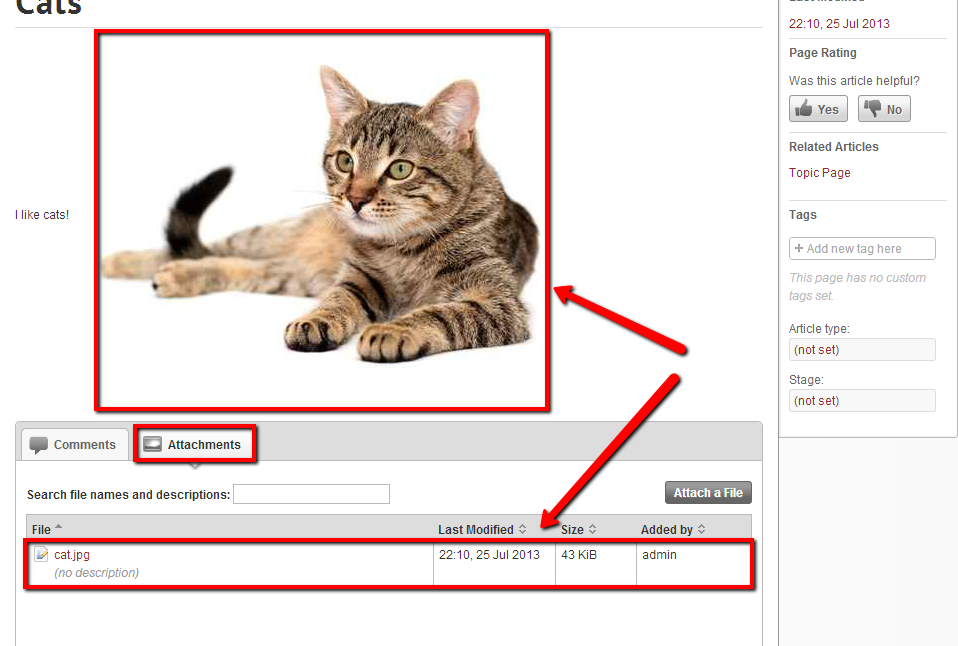
Now, if something happens to your image you will always be able to just navigate back to your attachments section and pull open that file again.