
Integrate search with your Salesforce case submission (Legacy)
Learn how to integrate Expert Search into a case submission form within Salesforce Portal or Salesforce Communities. This integration helps sync the experience between your Expert documentation and your Salesforce ticketing system, while also suggesting documentation for deflection purposes. This article is most relevant for support agents, site owners and developers.
How the integration works
When your customers are logged into your Salesforce Community/Portal, they can click on the custom Create New Case tab which will allow them to submit a new case to your Support team:

As a users starts to type in the Subject field, search results from your Expert site will be displayed on the right-hand side:
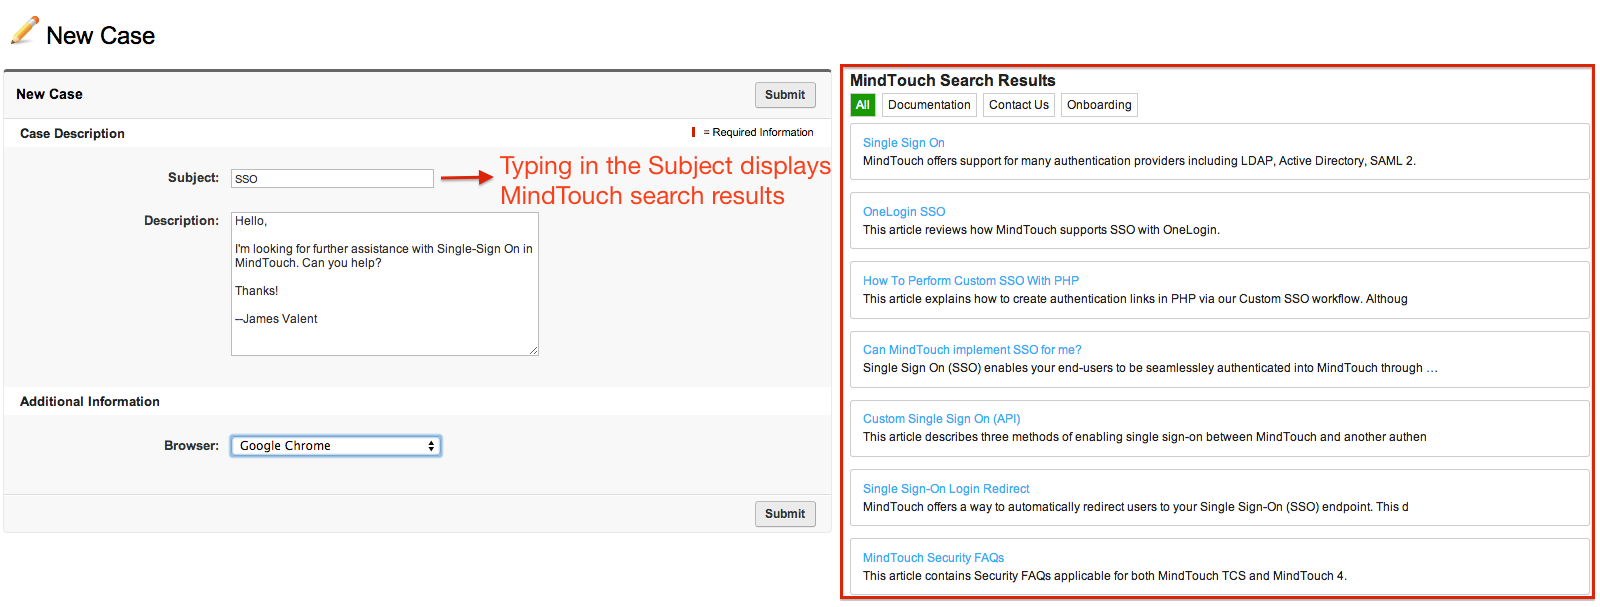
From there, users can drill down into the search results by clicking on the faceted category option at the top of the search results:
The faceted categories shown here will mirror your main site categories. This is a similar experience to using Search directly within Expert (see below), just re-styled for your Salesforce Community/Portal:
After submitting the new case, the user will be redirected to the newly created case in your Salesforce Community/Portal.
Considerations
- For a streamlined end-user experience, you may want to consider using CSS to hide the default New button in Cases. This will ensure that users can only create new cases using the custom Create New Case form.
- For your customer to use the Create New Case tab, they will need Create rights on the Salesforce Cases object.
- When choosing the facet options in the search results, the form does not re-search based on facets. In this case, the results are simply filtered based on the facets.
- Both the Apex Class and Visualforce Page were last tested against Salesforce API version 29.0.
- While this form is not officially supported, we hope you enjoy using it within Salesforce for your customers!
Installing the Create New Case form in Salesforce
Installing the Create New Case form in Salesforce includes three components:
Installing this custom form will require the following:
- Salesforce administrator access
- Previous experience with customizing Salesforce
- Approximately 1 hour of setup and testing
- Production and Development Salesforce environments
While Visualforce pages can be added directly to production Salesforce environments, custom Apex Classes can only be added into development Salesforce environments, and then deployed into production. For details on deploying custom classes from a development Salesforce environment, see Salesforce's documentation here.
Add custom apex class
- Log into your development Salesforce environment as an administrator.
- Navigate to Setup. From there, click on Develop > Apex Classes from the left-hand menu.
- Click New to create a new custom Apex Class.
- Set the title for the Apex Class to SubmitCaseController.
- Copy the code below into the text area:
public class SubmitCaseController { public Case c { get; set; } public SubmitCaseController() { AssignmentRule AR = new AssignmentRule(); AR = [select id from AssignmentRule where SobjectType = 'Case' and Active = true limit 1]; Database.DMLOptions dmlOpts = new Database.DMLOptions(); dmlOpts.assignmentRuleHeader.assignmentRuleId= AR.id; c = new Case(); c.setOptions(dmlOpts); } public List<SelectOption> getBrowserValues { get { List<SelectOption> options = getFieldValues(c, 'Browser__c'); return options; } set; } public static list<SelectOption> getFieldValues(SObject obj, String fld) { List<SelectOption> options = new List<SelectOption>(); map<String, Schema.SObjectField>fieldMap = obj.getSObjectType().getDescribe().fields.getMap(); list<Schema.PicklistEntry> values = fieldMap.get(fld).getDescribe().getPickListValues(); options.add(new SelectOption('', '--None--')); for (Schema.PicklistEntry a : values) { options.add(new SelectOption(a.getLabel(), a.getValue())); } return options; } public PageReference submitCase() { try { c.Origin = 'Communities'; INSERT c; PageReference casePage = new ApexPages.StandardController(c).view(); casePage.setRedirect(true); return casePage; } catch (Exception e) { ApexPages.addMessages(e); return null; } } } - In the code above, update the Salesforce API field name in line 14 to the corresponding drop-down you'd like users to select within the form. For example:
Browser__c
- Click on the "Version Settings" tab, and choose 29.0 from the drop-down menu.

- Click Save.
- Next create the Visualforce page.
Test apex class
- Create a new Apex class as instructed above.
- Paste in the following code:
/** * Class containing tests for SubmitCaseController */ @IsTest public with sharing class SubmitCaseControllerTest { @IsTest static void test() { SubmitCaseController controller = new SubmitCaseController(); PageReference page = controller.submitCase(); Case ca = new Case(Subject='Test Controller Case'); List<SelectOption> options = SubmitCaseController.getFieldValues(ca, 'Subject'); } } - Save the Apex Class, and name the file SubmitCaseControllerTest.
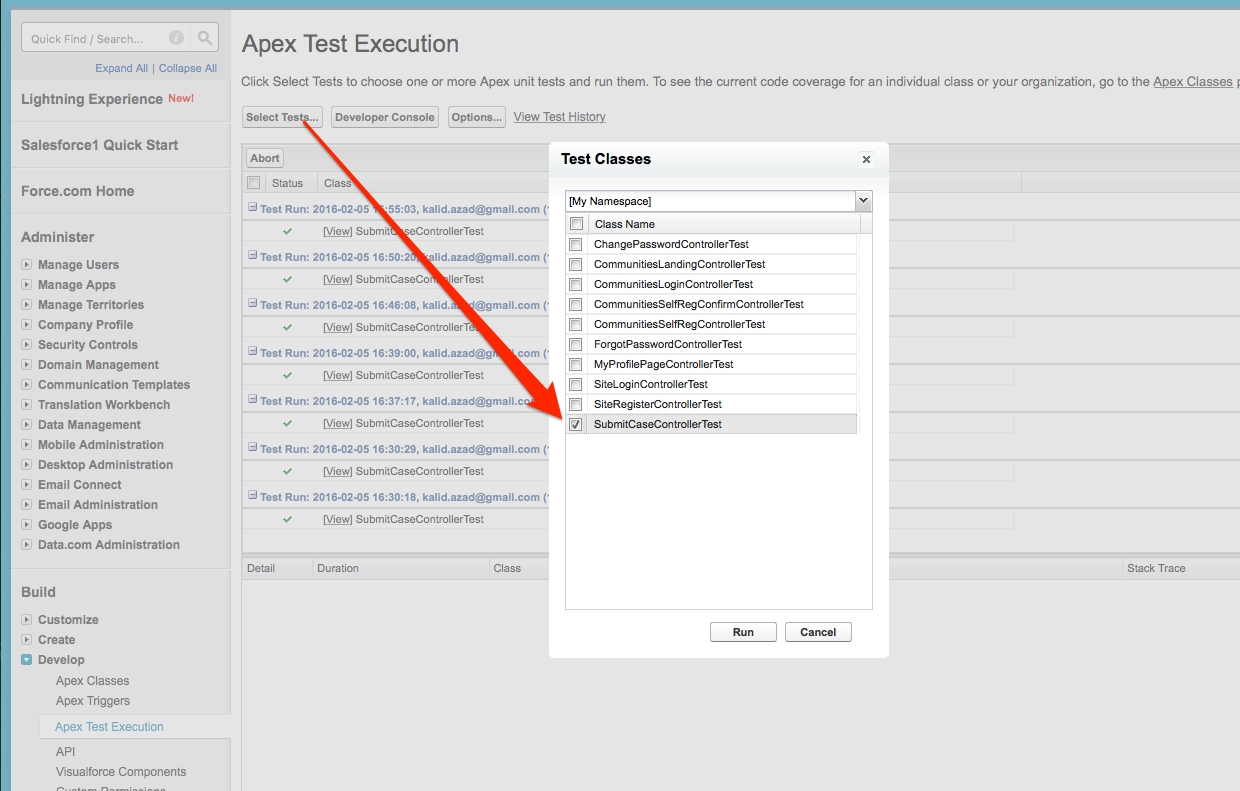
- Go to Setup > Develop > Apex Test Execution, select Tests, then run the test:
Custom Visualforce page
- Back in the Salesforce App Setup menu, click on Develop > Pages from the left-hand menu.
- Set the title for the Visualforce page to New Case.
- Copy the code below into the text area:
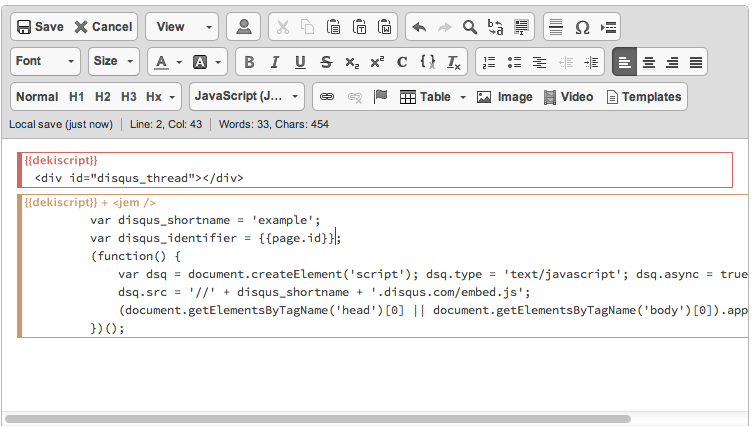
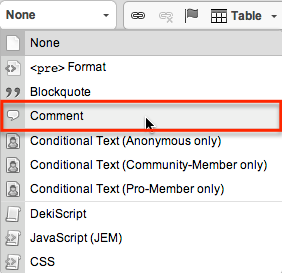
<apex:page controller="SubmitCaseController" id="TEST"> <head xmlns="http://www.w3.org/1999/xhtml"> <script type="text/javascript" src="https://cdnjs.cloudflare.com/ajax/libs/jquery/1.11.0/jquery.js"></script> <script type="text/javascript"> $(document).ready(function() { // Settings MindTouch = { URL: "https://yourmindtouchsite.mindtouch.us", WIDGET_NAME: "Communities", }; GeniusLink = {}; GeniusLink.search = function(query) { // cleanup and escape special characters var query = $.trim(query).replace(/[[\]'":+\-&|!(){}\[\]^~*?]/g, "\\$&"); var constraint = "+namespace:main AND +type:wiki"; var $results = $('.mt-search-results'); var $categories = $('<div></div>').addClass('mt-search-categories'); if (!$results || $results.length == 0) { return; } else { $results.html('').append($categories); } if (!query) { $results.text('Please enter a search'); return; } // prepare API request. Note: dream.out.pre is =? so it is a JSONP request var url = MindTouch.URL + '/@api/deki/site/query?dream.out.format=jsonp&dream.out.pre=?'; var params = { q: query, limit: 10, sortby: "-date,-rank", constraint: constraint, format: "search", origin: MindTouch.WIDGET_NAME }; $.ajax({ url: url, data: params, dataType: 'jsonp', success: function(data) { if (!data.search || !data.search.result) { $results.text('No results found'); return; } var results = data.search.result instanceof Array ? data.search.result : [data.search.result]; var categories = {}; // build "All Categories" button var $all = $('<span>All</span>').addClass('active').click(function(){ $('.mt-search-categories span').removeClass('active'); $('.mt-search-results li').show(); $(this).addClass('active'); }); $categories.append($all); // populate search results and categories $.each(results, function(i, result) { var $link = $('<a target="_blank"></a>').attr('href', result["uri"]).text(result.title); var $overview = $('<div class="overview">').text(result["content"]); $overview.click(function() { $(this).toggleClass('expanded'); }); var $li = $('<li></li>').append($link, $overview); $results.append($li); // build category filter - make URL paths reader-friendly var category = $.trim(result.page.path.split('/')[0].replace(/^[a-z0-9]+_/, '').replace(/_/g, ' ')); category = category || "Home"; if (typeof(categories[category]) == "undefined"){ categories[category] = []; var $span = $('<span>' + category + '</span>').click(function(){ // hide other results, show this one $('.mt-search-categories span').removeClass('active'); $('.mt-search-results li').hide(); $(this).addClass('active'); $(categories[category]).each(function(){ $(this).show(); }); }); $categories.append($span); } categories[category].push($li); }); } }); }; var timer = null; searchKeyPress = function(elm) { var query = $(elm).val(); clearTimeout(timer); // function needs to compute the filter to use... timer = setTimeout(function(){GeniusLink.search(query);}, 1000); } $('form[id^="TEST"]').addClass('half'); }); </script> <style> /*** search-results.css ***/ body { background: #fff; color: #333; font: 12px/1.5 Arial, Helvetica, sans-serif; height: auto; } .mt-case-search-results a { color: #30b3f6; text-decoration: none; } .mt-case-search-results a:hover { color: #30b3f6; text-decoration: underline; } .htmlAreaComponentModule { display:none; } /* containers */ .half { width: 50%; float: left; } .mt-contact-support-form { margin: 2em; overflow: hidden; } .mt-case-search-results { margin: 0 0 0 1.25em; padding: 0 .25em; width: 45%; } /* search results */ .mt-case-search-results-header { font-size: 1.3em; } .mt-case-search-results ul { list-style: none; margin: 1em 0 0; max-height: 400px; overflow: auto; padding: 0; } .mt-case-search-results li { border: 1px solid #ccc; border-radius: 3px; display: block; margin: 0 .5em 1em 0; padding: .8em 1em; word-wrap: break-word; } .mt-case-search-results li:hover { border: 1px solid #30b3f6; box-shadow: 0 0 3px rgba(48,179,246,.25); } .mt-case-search-results .mt-search-empty { border: 0; color: #999; font-size: 1.2em; font-style: italic; margin: 0; padding: .8em 0; } .mt-case-search-results .mt-search-empty:hover { border: 0; box-shadow: none; } .mt-search-title { display: block; font-weight: bold; word-wrap: break-word; } .mt-search-result { display: block; word-wrap: break-word; } /* buttons */ .btn, .btn:visited, body button, body .x-btn, body .btn { background: #ebebeb; border: 1px solid #bbb; border-color: #bbb #aaa #aaa #bbb; border-radius: 3px; box-shadow: 0 1px 0 0 rgba(0,0,0,.05); box-sizing: content-box; color: #333; cursor: pointer; display: inline-block; float: right; font: bold 12px/2em Arial, Helvetica, sans-serif; margin: 0; outline: none; padding: 0 .8em; text-align: center; text-decoration: none; text-shadow: 0 1px 0 rgba(255,255,255,.5); transition: all .1s linear; } .btn:hover, .btn:focus, .x-btn:hover, .x-btn:focus, button:hover, button:focus { background: #bbb; border: 1px solid #30b3f6; box-shadow: 0 1px 0 rgba(0,0,0,.05), 0 0 4px rgba(0,174,255,.5); color: #333; } .btn:active, button:active, .x-btn:active { background: #bbb; border-color: #1d89bc #62b4da #62b4da #1d89bc; box-shadow: inset 2px 1px 4px rgba(0,0,0,.3); color: #333; } /* forms */ #new-case-description, #new-case-additional { min-width: 340px; table-layout: fixed; } #new-case-description th, #new-case-additional th { padding-right: 0; width: 130px; } #new-case-description label, #new-case-additional label { color: #333; font-size: 1.2em; line-height: 1.8em; width: 130px; } #new-case-description label:after, #new-case-additional label:after { content: ':'; padding-right: 10px; } #new-case-description td, #new-case-additional td { padding-left: 0; width: 200px; } #new-case-description input, #new-case-description textarea { border: 1px solid #bbb; color: #333; font-family: Arial, Helvetica, sans-serif; margin: 3px 0 0; outline: none; padding: 1px 3px; width: 195px; } #new-case-description input { height: 15px; } #new-case-description textarea { width: 300px; } #new-case-additional select { border: 1px solid #bbb; font-size: 1em; padding: 1px; width: 210px; } #new-case-description input:focus, #new-case-description textarea:focus { border: 1px solid #999; box-shadow: 0 2px 3px #ddd; } .pbBottomButtons .pbTitle, .bPageBlock .pbTitle { width: 200px; } .pbButton .btn, .pbBottomButtons .pbButtonb .btn { line-height: 2em; padding: 0 .8em; } .mt-search-categories span { padding: 2px 5px; margin: 0 .5em .5em 0; border: 1px solid #ccc; display: inline-block; } .mt-search-categories span.active { background: #009900; color: #fff; } </style> </head> <apex:sectionHeader title="New Case" /> <apex:form > <apex:pageBlock title="New Case" mode="edit"> <apex:pageBlockButtons > <apex:commandButton value="Submit" action="{!submitCase}"/> </apex:pageBlockButtons> <apex:pageBlockSection title="Case Description" columns="1"> <table id="new-case-description"> <tr> <td><apex:inputText onkeyup="searchKeyPress(this)" required="true" value="{!c.Subject}"/></td> </tr> <tr> <td><apex:inputTextArea required="true" cols="65" rows="10" value="{!c.Description}"/></td> </tr> </table> </apex:pageBlockSection> <apex:pageBlockSection title="Additional Information" columns="1"> <table id="new-case-additional"> <tr> <td> <apex:selectList size="1" value="{!c.Browser__c}"> <apex:selectOptions value="{!getBrowserValues}"></apex:selectOptions> </apex:selectList> </td> </tr> </table> </apex:pageBlockSection> </apex:pageBlock> </apex:form> <div class="mt-case-search-results half"> <h1 class="mt-case-search-results-header">MindTouch Search Results</h1> <div class="mt-search-results"> <ul id="case-search-results"> <li class="mt-search-empty">Start typing in the subject field for search results</li> </ul> </div> </div> </apex:page> - Update the URL in line 8 to reflect your Expert site hostname.
- This must include HTTPS. For more information about configuring an SSL for your Expert site, see our SSL documentation.
- Click on the "Version Settings" tab, and choose 29.0 from the drop-down menu.
- Add the necessary visibility for the tab in.
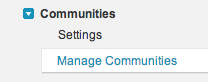
- Again in the left-hand Setup menu, choose Customize > Communities > Manage Communities:
- Click Edit next to the Community you would like to add the tab into:

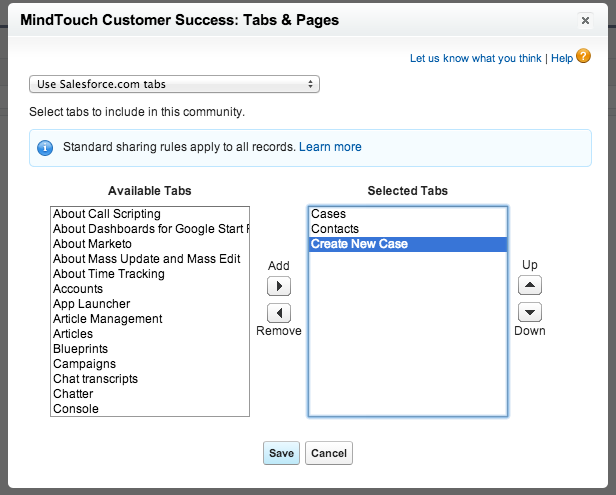
- Click Tabs & Pages:
- Choose the Create New Case tab from the Available Tabs and move it into the Selected Tabs:
- Click Save.
- Click save.
- Navigate to Customize > Cases > Fields.
- Click on the default Origin field.
- Add a new list option as Communities.
- This will ensure that all new cases created with the Create New Case form are identified as a "Communities" origin for reporting purposes.
- Save the field changes.
- Next, add the Create New Case form as a tab in your Salesforce Community/Portal.
Configure the Create New Case form in a Salesforce Community
For our example, we will run through how to add the Create New Case form into Salesforce Communities.
- Back in the Salesforce administrator Setup menu, click on Create > Tabs from the left-hand menu.
- Navigate to Visualforce Tabs and click New.
- Configure your tab as needed. Be sure to select your New Case Visualforce page from the first drop-down list:
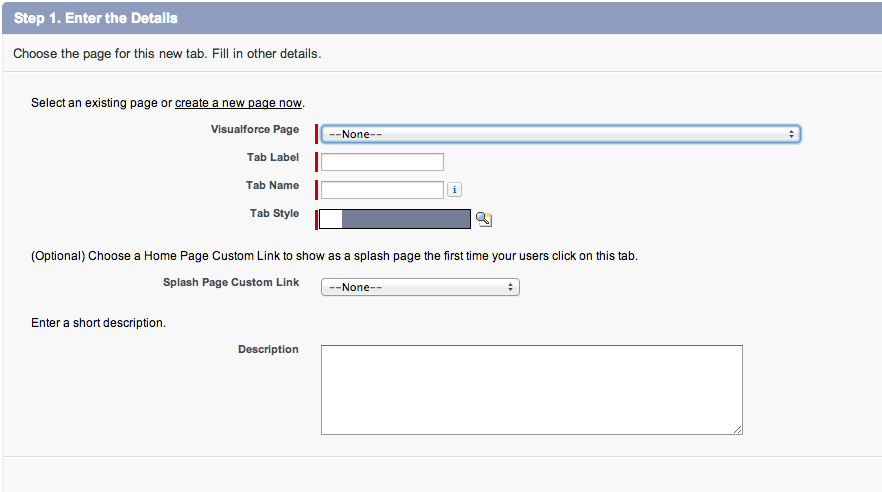
In our case, we added the Tab Label as Create New Case.
- Click on the "Version Settings" tab, and choose 29.0 from the drop-down menu.